[Home] [How it works] [Its a human Tesla Coil] [What does it cure] [History] [Foods that increase healing] [My theory] [Instructions] [Youtube videos] [Order Products] [Needleless Acupuncture Diodes] [ ] [AlexChiu.com] [Testimonial]
Build your own Cell Realignment Machine
I worked on this invention for almost 30 years. I never filed a patent for this because FDA will not allow me to promote this medical equipment publicly. And I heard that the patent office became more strict. And such invention might need some sort of proof when I present this to the patent office. So I decided to just document this on Youtube and on Way Back Machine (Internet Archive) to prove that I invented this whole system.
You need the following:
Why you should buy from us instead of building your own. Here's why:
It will cost you around $60 to build your own machine. That's because you have to buy parts from different sources. And you need to buy soldering iron and a volt meter. If you order from us, the machine is not expensive. We have all the parts in house and are ready to build when somebody places an order. Plus we provide the Immortality Rings for free. You need the Immortality Rings when you use this machine. So please consider our service before you decide to build it yourself.
This machine is extremely easy to build. It only has few parts. Even an elementary school kid can build this for fun.
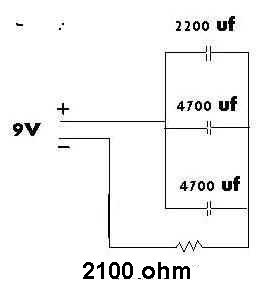
This is very easy to build. But remember, everything must be eaact according to the diagram. The cardboard turret must be exactly 5 and a half inch long. The plastic box must be 200 X 175 X 70mm. The resistance must be exactly 2100 ohm. If one little thing is wrong, your machine won't work.
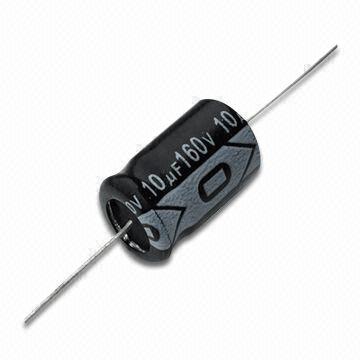
This is what the Axial type looks like. Axial means each end of the capacitor has a wire attached to it.
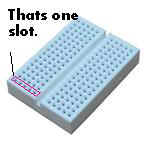
This is a breadboard that's about 2 inches and 1.5 inch square. Look at the picture. Every row of 5 holes is a slot. Which means, these 5 holes share the same connection. To learn how to use a breadboard, please search on Google.
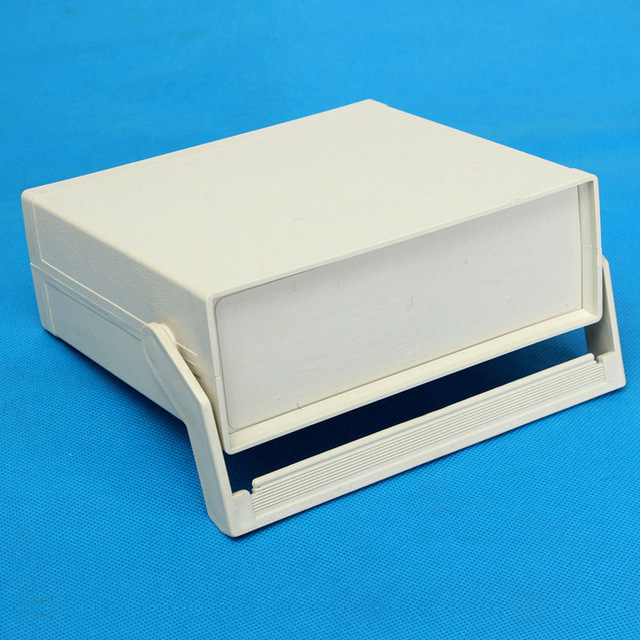
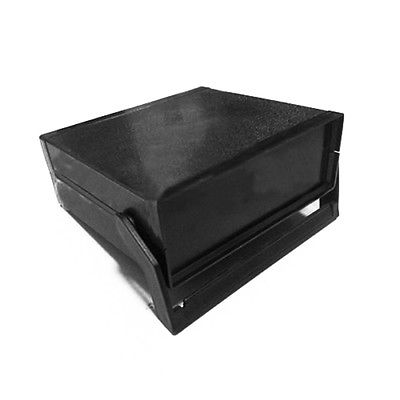
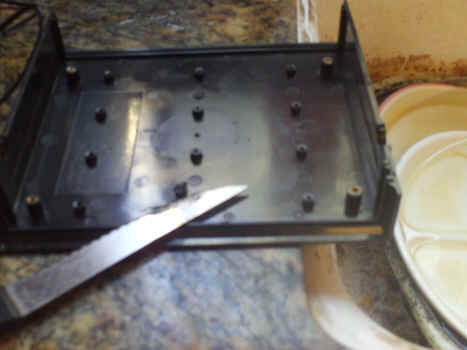
And you can buy a plastic box that holds your electronics project. The front end of the box must be open so that electrons can escape out of the box and travel into the human body. You can buy a box like this one. It measures 200mm X 175mm X 70mm. They come in 2 colors. White or black. If you want to buy the black one, they sell it here.
And glue. I recommend silicone glue like Goop.

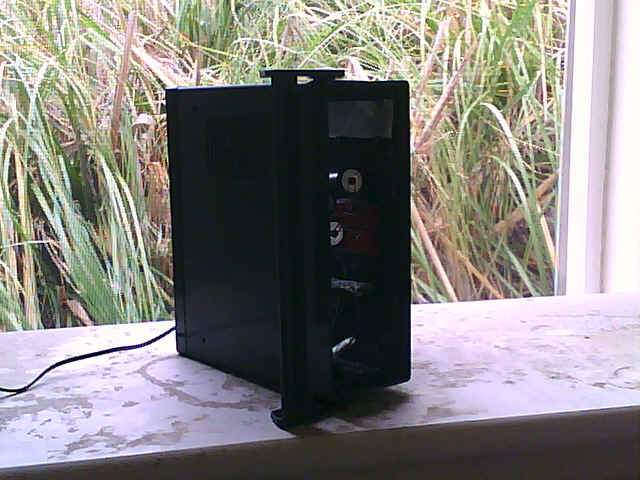
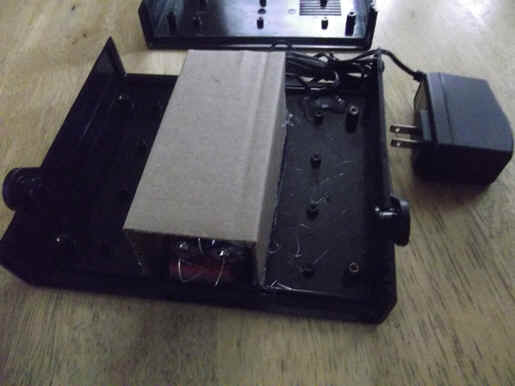
This is the open box of the machine. The capacitor is at the front of the machine. Of course, the front end of the machine faces the human body, where the injury is. The capacitor and the resistors are to be inserted onto the breadboard.
The plastic box might be full of studs on the surface. So if you want to place the breadboard at the front end of the plastic box, you have to cut off 1 or 2 studs. What I do is I take a steak knife and I heat it up on a stove. When its hot enough, I use it to saw off a stud at the front of the plastic box.

Once the stud has been saw off, I place the breadboard on the front end of the plastic box.
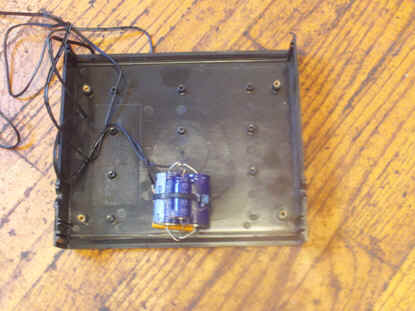
You assemble all the resistors, the capacitors, and wire on that small breadboard. The negative side of the capacitors must face the front end of the machine. And the breadboard must be placed near the front end of the machine. See the photo above.
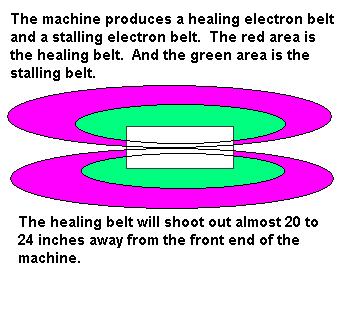
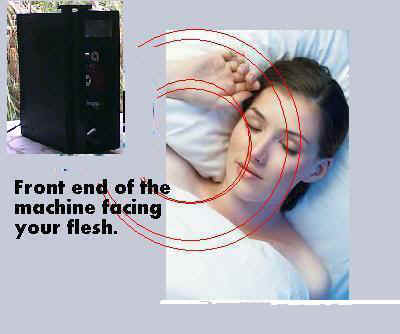
The negative side of the capacitor is facing the front of the machine. I designed it this way so that the negative side of the capacitor can suck out the positive energy of your flesh in order to shrink the cells.
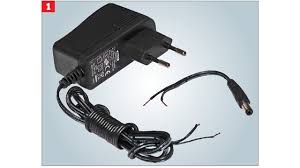
You cut the plug head of the 9 volt adaptor off. Then you can drill a hole at the back of the machine and pull the wires of the adaptor into the hole. Then you just strip off the plastic from the tip of the wire and connect them to the positive side of the capacitors and one to the resistor. See the schematic at the top of this page. You need a volt meter to find out which wire is negative and which is positibve.
The enclosure box comes with 4 metal screws. Throw them away! The metal screws are too big. They will suck all the electrons away from the capacitor. The electrons are supposed to leak into your body and not into those screws. So you can just tape the bottom and top portion of the box together with scotch tape or tie them together with a rubberband. Do not use the metal screws.
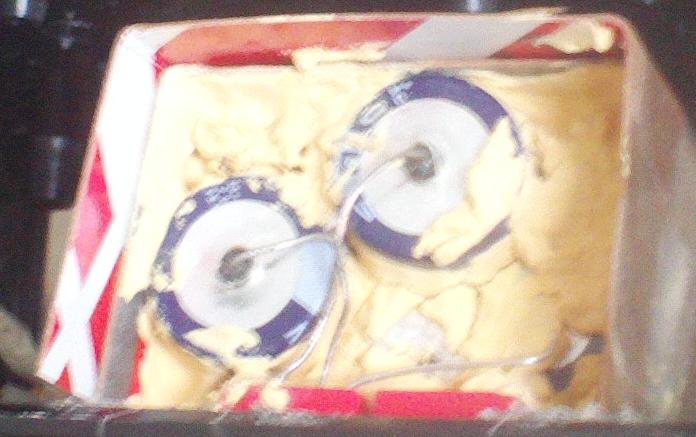
You need to get a piece of cardboard to cover up the capacitors. Wrap a piece of plastic bag between the capacitors and the cardboard. You have to see the video to understand what I mean. I mean the video at the top of this page.
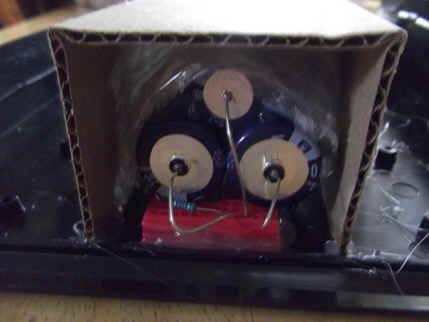
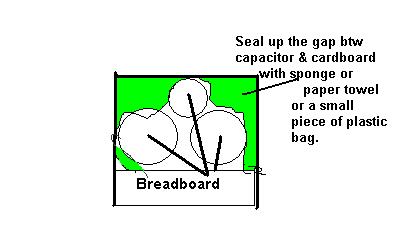
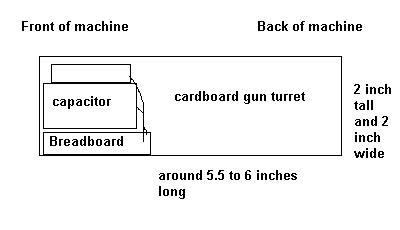
Cut pieces of plastic bag and stuff it between the capacitors and the wall of the cardboard tunnel. Also fill up the opening between the capacitors and the breadboard with plastic bag and glue. This will block electrons from traveling back to the other side of the capacitors directly through the gap. You can use pieces of plastic bag or paper towel or sponge. And this cardboard gun turret should be around 5 inch and a half or 6 inches long. And it should be 2 inch high and 2 inch wide. The whole idea is to make all electrons leak from one end of the capacitor to the other end by FLYING OUT of the cardboard tunnel. No electron shall travel from one end of the capacitor to the other end just by flying inside the cardboard tunnel by slipping through a small opening. Make sure do not glue up the silver wires of the caacitors. The electrons should be allowed to leak out through the wires of the capacitors.
Here is a bad job. The opening is just half sealed. You can see light shine through the tunnel. In this machine, the electrons will simply leak from one end of the capacitor and travel to the other end just by flying through the open space inside the cardboard tunnel. This machine still works. But the power is a lot weaker than expected.
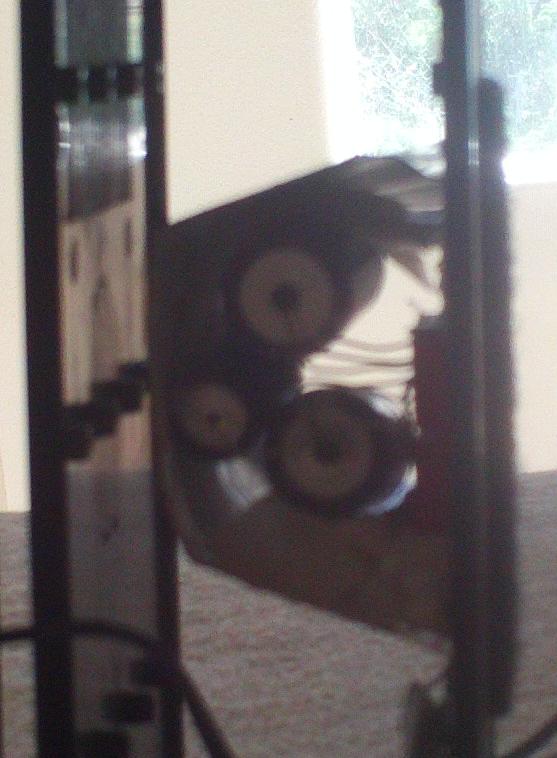
This is a good job. The opening inside the tunnel is completely sealed off with wood putty and some styrofoam. Not a milimeter opening is left. So electrons cannot leak from one end of the capacitor to reach the other end by flying through an opening inside the tunnel. This machine is extremely strong. Y I recommand you to use wood putty or air dry modelling clay to seal up all the gap shut. Silicone glue is not recommended to seal up gaps because its too wet and might ruin the condictivity of the wires that were inserted into the breadboard. But make sure there is no hole inside the cardboard tunnel for electrons to fly though. All electrons must travel out of the tunnel.
The wood putty have covered up the 3rd capacitor. So it appears to have only 2 capacitors. But the wires of all 3 capacitors are not covered up. So electrons still can leak.
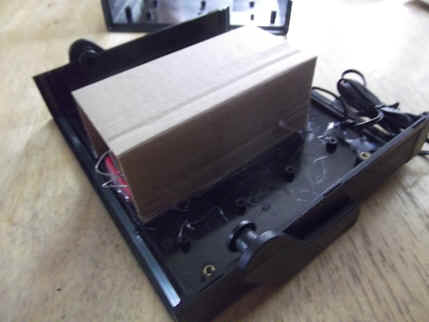
The machine, when assembled, should be used standing up like a tower. See these photos.